
History · Questions & answers (11)
GIF Dither — User Guide (v1.3)
ivo3d FX · After Effects / Premiere Pro · Windows (macOS coming)
GIF Dither turns any footage into the classic dither look: the crunchy ordered raster of early GIFs, 1-bit Macintosh screens, Game Boy and C64 graphics, the organic grain of error diffusion (Floyd-Steinberg, Atkinson and friends — with full control over the famous "crawling worms") — or, with the QR Style controls, a modern "pixel-density" texture where dark areas collapse into big blocks.
Find it under Effect → ivo3d FX → GIF Dither. Works in 8, 16 and 32 bpc, supports Multi-Frame Rendering, and every parameter can be keyframed or driven by expressions.
History
Where the name comes from
Dithering is older than computers: the printer's halftone screen did the same job with ink dots a century earlier. The word itself is usually traced to the Second World War — the mechanical computers in bombers ran more accurately while the aircraft vibrated, so engineers built the shaking in on purpose, and "dither" crossed into signal processing as the noise you add to make quantization honest. The ordered matrix is Bryce Bayer's (Kodak, 1973 — the same Bayer as the camera sensor filter). Error diffusion arrived in 1976 with Robert Floyd and Louis Steinberg's four-pixel kernel; Jarvis, Judice and Ninke published the same year, Stucki in 1981, Stevenson and Arce in 1985, Burkes in 1988, and Frankie Sierra's three filters in 1989–90. Bill Atkinson wrote his deliberately lossy variant at Apple for the original Macintosh's 1-bit screen in the mid-1980s — that is the "old Mac look". Then the GIF format (CompuServe, 1987) capped images at 256 colours, and dithering became the texture of the early web. What the plug-in integrates: Bayer 2×2 to 16×16, all nine classic error-diffusion kernels running on a cell grid, and a few things the originals never had — a stability control, the worms on a dial, size modulation and a dithered alpha channel.
Quick start
- Apply the effect to a layer with continuous tones (video, photo, gradient). Flat graphics with only black and white will look unchanged — the effect needs mid-tones to work on.
- Default settings give a 1-pixel, black-and-white 4×4 ordered dither (the "Mac 1-bit" look).
- Raise Cell Size to 2–4 px for a chunkier retro feel; switch Matrix to 8×8 or 16×16 for smoother gradients; pick a Preset Palette for Game Boy / C64 colours.
Cells
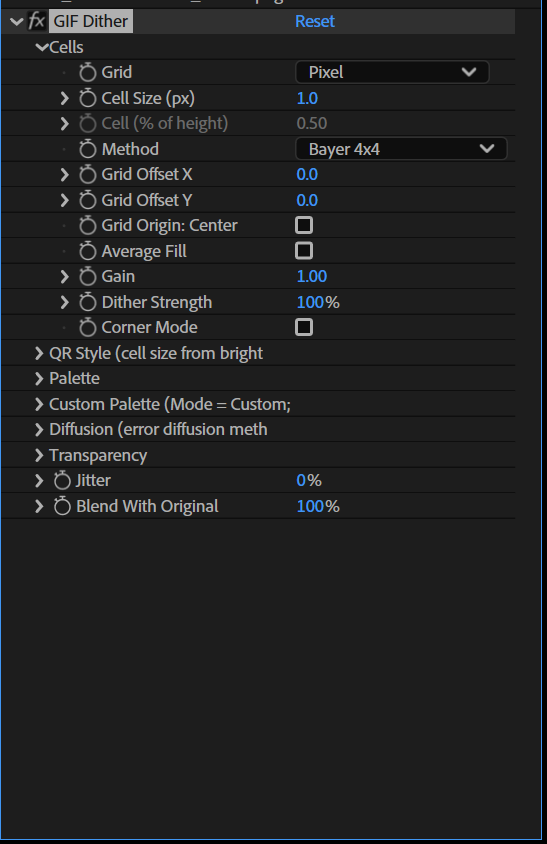
Grid — how the cell grid is measured. Pixel (default) works in the layer's pixel grid: Cell Size is in pixels, exactly as before. Relative works in the layer's own space: the cell is a percentage of the layer height, every cell colour and every QR block decision comes from the average of the area it covers, and the largest block never exceeds the layer height. The same settings give the same picture at 720p, 1080p and 4K — and Size Modulation no longer "restarts" at the top end. Existing projects open in Pixel and render exactly as they did.
Cell Size (px) — Pixel mode only. The size of one dither "pixel". 1 = true per-pixel dithering. 2–4 px gives the chunky retro look; at 4K you will usually want 2–3 px. The cell size follows the preview resolution, so Half/Quarter previews look the same as the final render. (Greyed out in Relative mode.)
Cell (% of height) — Relative mode only. 0.5 % ≈ 3.6 px on 720p, 5.4 px on 1080p, 10.8 px on 4K. Cells still come in power-of-two steps, so the QR sizes tile without seams. (Greyed out in Pixel mode.)
Which grid should I use?
- Pixel — LED walls, pixel-pitch-matched screens, anything that must tile pixel-exactly across displays, or where you are matching an existing raster by eye and counting pixels.
- Relative — the same footage delivered at different resolutions: proxy → final, 720p → 4K, a square social crop and a wide master from one comp. Set the look once and it survives the resolution change instead of turning into a different texture.
Grid Offset stays in pixels in both modes — it is a nudge, not a layout unit. In Relative mode the render is pixel-exact across resolutions at Grid Offset 0; if you need a resolution-independent anchor, use the Grid Origin: Center checkbox instead of an offset. Note also that Relative mode is exact across resolutions only at Grid Offset 0 and where the cell works out to a whole number of pixels; at fractional cell sizes you get "the same picture", not a bit-identical one — the cell boundaries simply cannot land on the same pixel edges at both resolutions.
Method — how each cell decides between ink and paper.
Ordered (Bayer 2×2 / 4×4 / 8×8 / 16×16) — a fixed threshold matrix. Bigger matrix = more tone steps (4, 16, 64, 256) and a less visible repeating grid. Compare them on a smooth gradient: 2×2 shows 4 bands, 16×16 looks almost continuous. Perfectly stable in animation — the pattern is locked to the layer.
Error diffusion (Floyd-Steinberg, Jarvis-Judice-Ninke, Stucki, Atkinson, Burkes, Sierra, Sierra Two-Row, Sierra Lite, Stevenson-Arce) — each cell's rounding error is pushed onto its neighbours, giving the organic, grain-like texture of classic image converters. Character guide: Floyd-Steinberg is the all-rounder; Jarvis and Stucki are smoother and wider; Atkinson (the old Mac look) deliberately loses a quarter of the error, so highlights and shadows blow out beautifully; Burkes and the Sierra family sit between FS and Stucki (Sierra Lite is the fastest); Stevenson-Arce has a distinctive sparse, woven texture. All of them come with the Diffusion control group below. Tip: the method does not change the pixel size — that is Cell Size.
Grid Offset X / Y — slides the whole grid (cells, the QR coarse grid and the error diffusion field together) by the given amount in pixels, with sub-pixel precision. Use it to line the raster up exactly with a layout, LED wall or another dithered layer — or animate it: keyframe X for a slowly scrolling raster over a still image, wiggle both for a nervous CRT feel, or pick-whip it to audio. Offsets are in layer pixels and follow the preview resolution, so Half-res previews match the final render. They stay in pixels in both Grid modes.
Grid Origin: Center — off by default. Anchors the grid to the centre of the layer instead of the top-left corner. Cells, QR blocks and the error-diffusion field all grow outwards from the middle, so symmetric footage stays symmetric. Works in both Grid modes, and unlike Grid Offset it is resolution-independent — half a layer is half a layer at any size. With an odd number of cells the edge cells are clipped; that is the point, the pattern is built from the centre out. One measured detail: in Pixel mode the cell colour is sampled at the cell's centre pixel, so mirror symmetry is exact for odd Cell Sizes (3, 5, 7 px…) and only approximate for even ones; Relative mode averages the whole cell and is exactly symmetric at any cell size. Since v0.5 the even-Cell-Size case has an opt-in cure in Pixel mode too — see Average Fill just below.
Average Fill (v0.5) — off by default. Pixel mode only. Changes where each cell takes its colour from: instead of the single pixel at the centre of the cell, the cell is filled with the average of every pixel it covers — exactly how Relative mode has always sampled, but with the cell size still given in pixels. With QR Style on, the block-size decision reads the average of the coarse block as well, not one pixel from its middle. Error diffusion methods use it too: the value fed into the diffusion pass becomes the cell average.
When to turn it on:
- Even Cell Sizes with Grid Origin: Center. An even-sized cell has no centre pixel — the sampler has to pick one of the two middle pixels, and on the mirrored side of the layer it picks the other one, so mirror-symmetric footage comes back slightly asymmetric. Measured on a mirror-symmetric 512 px test frame at Cell Size 4 with Grid Origin: Center: 117 872 of 131 072 mirrored pixel pairs differ (8-bit comparison). With Average Fill on, the same frame gives 0 — mirror-exact. Odd Cell Sizes were already symmetric and stay so.
- Noisy or grainy footage. One pixel per cell means one grain of noise decides the whole cell, which flickers frame to frame. The average is a real low-pass filter, so the raster calms down without softening the source itself.
- The GIF-ish "cell average" look — flatter, more poster-like blocks: closer to a box downsample than to a point sample.
What it does not do: it does not bring over the Relative mode's coarse-grid size cap. Average Fill is sampling only — the coarse-grid cap is a Relative-mode feature. In Pixel mode the QR coarse grid stays Cell Size × 2^n, with n coming from Size Modulation alone and no ceiling tied to the layer height. That is deliberate: the same Cell Size and Size Modulation must produce the same physical grid on two LED walls of different heights. (Relative mode caps at the layer height because there the cell is a percentage of that height to begin with.)
Cost: the same as Relative mode — one extra pass over the whole layer to build the cell-average pyramid, and the effect asks After Effects for the entire layer instead of just the visible region. With the checkbox off none of that happens, and the render is bit-for-bit what it was before (verified by the offline baseline: all 95 pre-v0.5 reference images are unchanged).
In Relative mode the checkbox is greyed out — that mode always averages.
Gain — brightness multiplier applied before thresholding. Below 1 darkens (more ink), above 1 brightens (more paper). This is the parameter to drive from audio (see below).
Dither Strength — 100% is full ordered dithering. Lower values reduce the raster until, at 0%, you get plain posterization (hard steps, no pattern). 40–70% gives a softer "web GIF" feel.
Corner Mode — off by default. Changes the order in which the cells of the Bayer matrix switch on, not the matrix size. Normally the dots are spread as evenly as possible; with Corner Mode on they grow outwards from a few seeds instead, so neighbouring dots meet at their corners and mid-tones read as small diagonal clumps rather than a fine even grain — a chunkier, more "printed" texture, still perfectly stable in animation. The checkerboard rule is untouched (below 50% ink the dots never touch edge-to-edge), so the tonal response is identical — only the pattern differs. Visible on Bayer 4×4, 8×8 and 16×16; at 2×2 it does nothing (that matrix is already this look), and it does nothing for the error diffusion methods either — the checkbox greys out for those. Works together with QR Style size modulation.
QR Style (cell size from brightness)
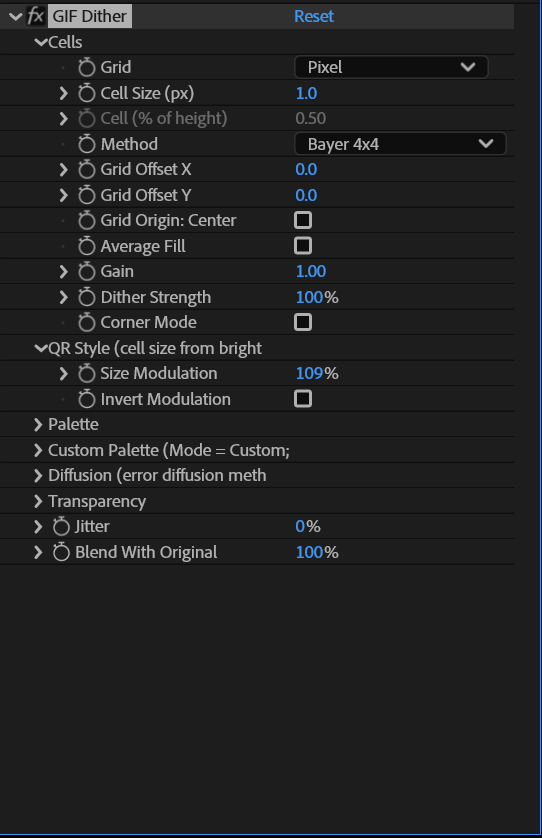
Collapsed and off by default (0%). Turn it up and the cell size starts to depend on local brightness: dark areas get larger cells, bright areas stay fine — the image reads like a QR code / halftone made of square blocks.
Size Modulation — 0% = classic dither, all cells the same size. 100% = dark areas get cells up to 4× the Cell Size. Up to 400%, where the darkest areas collapse into blocks 256× the Cell Size — extreme, graphic, great for titles and LED walls. Cells always stay powers of two, so the different sizes tile without seams. The slider maps to the same power-of-two steps in both Grid modes — what you learned in Pixel mode still applies in Relative.
Invert Modulation — flips the rule: bright areas get the big cells.
Known property of Pixel mode: with a large Cell Size, Size Modulation above ~300 % can make the biggest block larger than the frame; its brightness class is then decided by a single pixel, so the whole frame can flip to small cells and the modulation appears to "restart" at the top of the slider. Keep Size Modulation ≤ 300 % at Cell Size 3 — or switch Grid to Relative, where the biggest block is capped at the layer height and every block's brightness class comes from the average of the area it covers, so the top end stays smooth.
Palette
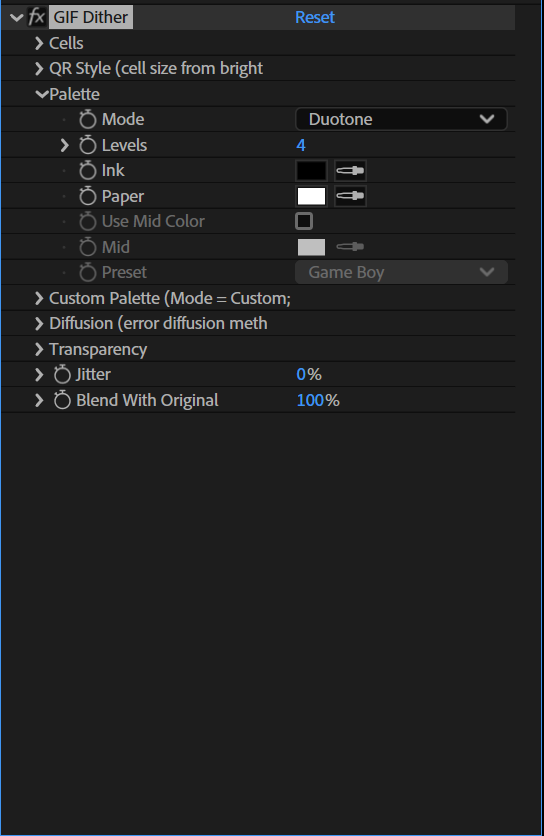
Mode
- Duotone — 1-bit: every cell is either Ink or Paper. The classic.
- Levels (Ink to Paper) — a ramp between Ink and Paper in Levels steps, dithered between steps.
- RGB Levels — quantizes each colour channel separately (Levels steps per channel). This is the real "256-colour GIF" look; 2–3 levels gives CGA/EGA style colour.
- Preset Palette — snaps to a fixed historical palette, dithered.
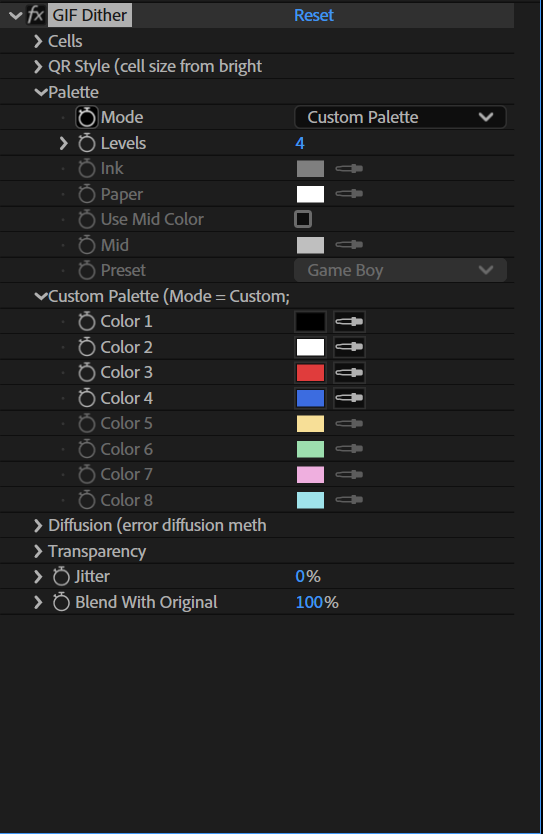
- Custom Palette — your own palette of 2–8 colours, quantized and dithered by exactly the same code as a preset. Levels sets how many colours are in play; see below.
Levels — number of steps per channel (2–8). Used by Levels and RGB Levels modes. ☠ In Custom Palette mode this same slider means something else — the number of colours — see the Custom Palette block below.
Ink / Paper — the two colours for Duotone and Levels modes. Swap them for a negative.
Use Mid Color / Mid — in Levels mode with 3 or more levels, the ramp passes through Mid at the half-way point (Ink → Mid → Paper). Use it for three-colour risograph looks. It has no effect in Duotone, RGB Levels or Preset modes.
Preset — Game Boy (4 greens), Commodore 64 (16), CGA Palette 0 (green/red/yellow), CGA Palette 1 (cyan/magenta/white), ZX Spectrum (15), PICO-8 (16), Amber Terminal, Green Terminal. Only active when Mode = Preset Palette.
Custom Palette (Color 1–8) — the fifth Mode: instead of a historical preset, the palette is yours. It runs through exactly the same quantizer as the presets — nearest colour, then dithered by the current Method — so QR Style, Diffusion, Corner Mode, Dither Alpha and everything else behave identically. Nothing about the raster changes; only which colours it is allowed to use.
☠ Levels is the palette size here, not the number of steps per channel. Set Levels to 6 and the first six wells are live — Color 7 and Color 8 grey out. The range is the usual 2–8, and the whole group is greyed out in every other Mode.
The eight defaults are a ready-made set — black, white, red, blue, gold, green, magenta, cyan — so Levels 2 is plain black-and-white, 4 is a CGA-ish quartet and 8 is the lot. Two ways to use it: eyedropper the colours off the footage itself, which gives a raster that belongs to the shot rather than to 1985; or type in the hex values of a real hardware palette that is not in the Preset list (MSX, Apple II, Teletext, a brand guide). The wells are ordinary After Effects colour parameters, so they keyframe and pick-whip like anything else — drifting Color 2 and Color 3 through a hue recolours the whole image without touching the structure.
Diffusion (error diffusion methods)
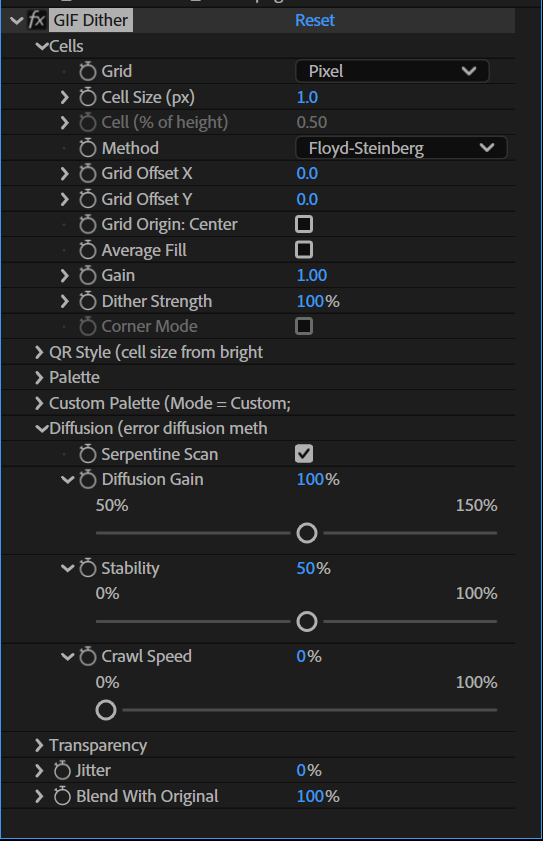
Active only when Method is one of the error diffusion algorithms. This group is where GIF Dither goes beyond other dither plugins: error diffusion is famous for two artifacts — the "worms" (snaking chains of dots in smooth areas) and the frame-to-frame "boiling" in animation. Most tools treat both as bugs. Here they are on a dial: kill them completely, or turn them into the effect.
Serpentine Scan — despite the name, this is the anti-snake switch. "Serpentine" describes the scan path, not the look: rows are processed in alternating directions — left-to-right, then right-to-left, like mowing a lawn. Because the leftover error never travels in the same direction for long, the infamous diagonal "worm" patterns get chopped up and the grain comes out calm and direction-free. So remember: ON (default) = no worms. OFF = classic one-way raster scan — this is where the worms live. Want the crawling-snake look? Turn Serpentine OFF, pull Stability down, and add some Crawl Speed.
Diffusion Gain — how much of the rounding error is passed on. 100% is the textbook algorithm. Below 100% the image drifts toward clean posterization; above 100% the error overflows and the worms grow fat and aggressive.
Stability — the anti-flicker control, 0–100%. It anchors the dots to a fixed pattern and adds a small dead-zone on the input, so film grain and compression noise stop re-rolling the whole pattern every frame. 0% = raw, living error diffusion (every frame re-flows — the boiling look), 100% = locked, broadcast-safe grain (converges toward an ordered look). 40–60% keeps the organic texture while staying calm. For static footage with no grain the pattern is already deterministic at any setting.
Crawl Speed — makes the worms swim on purpose, even on a completely still image. 0% = frozen. Above 0% a slow wave drifts through the threshold and the worm patterns writhe organically; higher = faster. Keyframe it, or drive it from audio (see the audio-reactive recipe) for worms that dance to the music. Combine with low Stability and Serpentine off for maximum snake.
Edge Warm-up (on by default) — cures the "cold start" of error diffusion. The algorithm sweeps the layer from the top-left corner with an empty error budget, so the first rows and the first columns are starved: on dark, noisy footage you see a thin sparse band along the top and the left edge, and with Diffusion Gain above 100 % the band grows into a 15–25 cell black strip where nothing is born yet. With Edge Warm-up on, the diffusion runs a 32-cell warm-up lap above and beside the layer on a mirrored copy of the picture's own edge, so it arrives at the real top-left corner already "in flow" and the pattern is uniform right up to the edge. It costs about 5–8 % of the error diffusion pass at Cell Size 1 and next to nothing at larger cells. Turn it off only to reproduce an old render exactly — with it off the result is bit-for-bit the v1.2 image. Note what it cannot do: on a black or near-black background (below roughly 1 % — measured: at 0.4 % grey the render is identical with and without it, at 5 % the warm-up works in full) with Diffusion Gain above 100 %, the worm carpet still only grows downstream of the picture's light areas — that is the physics of error diffusion (error only flows from where there is signal), not an edge effect; a touch of noise on the background seeds it everywhere.
Performance note: error diffusion is a sequential algorithm and runs on the full frame. At 4K with Cell Size 1 expect roughly half a second per frame per core (Multi-Frame Rendering still renders several frames in parallel); Cell Size 2–3 is 4–20× faster and usually looks better anyway.
Transparency
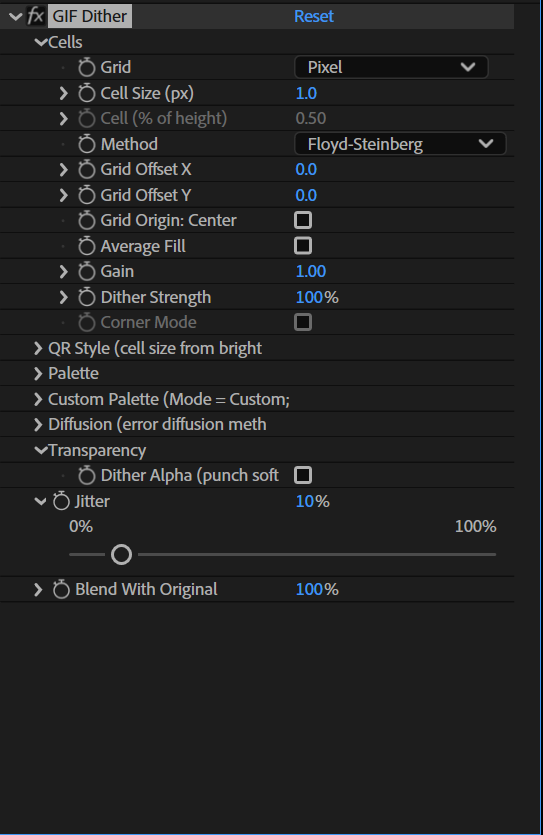
Dither Alpha (punch soft masks) — off by default. When enabled, soft transparency — feathered masks, gradient mattes, motion-blurred edges, drop shadows — is dithered too: every cell becomes either fully opaque or fully transparent, following the same Method and cell grid as the colour. A feathered mask edge turns into a punched, perforated dissolve instead of a smooth fade (the same idea as applying a grain effect to a mask in Illustrator — but animated, and with error diffusion).
Things to try: a feathered mask on footage over a coloured background; a text layer with a soft edge; keyframe the mask feather from 0 to huge while Dither Alpha is on — the layer disintegrates into the pattern. With QR Style size modulation the holes follow the variable cell size, so edges crumble into big blocks. Blend With Original also blends the alpha, so 50% gives you half-punched, half-feathered edges.
Jitter
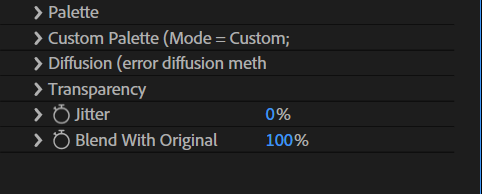
Shifts the dither pattern in steps over time — the restless "shimmer" of animated GIFs. 0% = static. 100% = 12 jumps per second; 25% ≈ 3 per second. The pattern jumps, it never slides, so the raster stays crisp. (Only visible during playback or scrubbing.)
Blend With Original
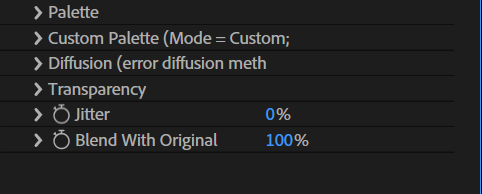
Dry/wet mix. 100% = full effect, 0% = original. Useful for subtle texture at 20–40%.
Recipes
- 1-bit Mac — defaults. Cell 1–2, 4×4, Duotone, black/white.
- Game Boy — Cell 3, Matrix 4×4, Mode Preset → Game Boy.
- Web GIF 1998 — Cell 1, Matrix 8×8, Mode RGB Levels, Levels 3, Dither Strength 70%, Jitter 25%.
- Risograph — Mode Levels, Levels 3, Use Mid, Ink dark blue / Mid pink / Paper cream.
- QR Wall — Cell 2, Size Modulation 300%, Duotone. Try Invert Modulation on bright footage.
- Resolution-proof QR Wall — Grid Relative, Cell 0.3 %, Size Modulation 400 %, Grid Origin: Center ON, Duotone. Renders the same texture on a 720p proxy and a 4K master, and the biggest blocks stay inside the frame.
- Classic Mac scan — Cell 1–2, Method Atkinson, Duotone black/white, Stability 60%.
- Living worms — Cell 2, Method Floyd-Steinberg, Serpentine OFF, Stability 0%, Crawl Speed 30%. The full crawling-snake look, on demand — on video or on a still.
- Newsprint calm — Method Stucki, Stability 80%, Levels mode with 3 levels.
- Disintegrating logo — logo/text layer, big feathered mask, Dither Alpha ON, Method Atkinson, Cell 2. Animate the feather (or the mask path) and the logo crumbles into dither. Add Size Modulation 200% for big-block crumbling.
- Audio-reactive raster — select your music layer → Animation → Keyframe Assistant → Convert Audio to Keyframes. Then pick-whip Gain to the Audio Amplitude slider with an expression like
0.6 + value/30(tune the divisor). Four other targets are worth knowing, each giving a different reading of the same music: Cell Size (the raster itself breathes — keep it to a small range, 1–4, or the look changes rather than pulses), Dither Strength (the raster dissolves toward flat quantization between hits), Size Modulation in QR Style (the blocks pump), and Crawl Speed (worms that dance). ☠ Convert Audio to Keyframes writes one keyframe per frame, so the value is as jumpy as the waveform: divide it well down, and if percussive material makes it stutter, select the Slider's keyframes and run Window → The Smoother, or drive a low-pass of your own with an expression. Keep the multiplier small enough that the quietest frame still looks like your shot — the effect should pulse, not switch on. - Your own hardware palette — Mode Custom Palette, Levels = however many colours you need, then type or eyedropper them into Color 1–8. Cell 2, Matrix 8×8. This is the route for any machine the Preset list does not have (MSX, Apple II, Teletext) and for brand-guide colours; for a palette that belongs to the footage, eyedropper the colours straight off the frame.
Tips
- Presets: select the effect → Animation → Save Animation Preset (.ffx). They show up in Effects & Presets and can be dragged onto any layer.
- Render the final at 100% resolution; the cell grid is computed in layer pixels.
- For an "emulated low frame rate" add Posterize Time before GIF Dither.
- Premiere Pro: the same plug-in appears under Video Effects → ivo3d FX.
Version notes
- v1.3 — Edge Warm-up (Diffusion group, on by default): the error diffusion pass warms up on a mirrored 32-cell margin above and beside the layer, so the sparse band along the top and left edges (a black strip with Diffusion Gain above 100 %) is gone. Off = bit-for-bit the v1.2 render; existing projects open with it on.
- v1.2 — performance round, bit-exact: ordered cell pass, precomputed palette, faster error diffusion taps. About/PiPL/Help now share one version number.
- v0.5 — Average Fill: an opt-in checkbox that gives Pixel mode the Relative mode's sampling — every cell (and every QR block decision, and the error-diffusion input) reads the average of the area it covers instead of one centre pixel. Cures the even-Cell-Size mirror asymmetry under Grid Origin: Center (measured: 117 872 → 0 asymmetric pairs), calms noisy footage, and gives a flatter "cell average" look. It adds no coarse-grid size cap — that stays a Relative-mode feature, so a pixel-pitched LED-wall grid is unaffected. Off by default, greyed out in Relative mode, and with it off the Pixel-mode render is bit-for-bit v0.4.
- v0.4 — Relative grid: resolution-independent cells (Cell (% of height)), average-based cell colours and QR block decisions, and a size cap at the layer height, chosen with the new Grid popup; plus Grid Origin: Center, which anchors the whole grid (cells, QR blocks and the error-diffusion field) to the middle of the layer in both Grid modes. Existing projects are untouched: Grid defaults to Pixel and Grid Origin: Center to off, and the Pixel-mode render is bit-for-bit identical to v0.3.3.
- v0.3.3 — Corner Mode: a second ordered pattern for Bayer 4×4/8×8/16×16, where the dots grow into corner-connected clumps instead of spreading evenly. The same build also brought Custom Palette (Mode → Custom Palette, plus Color 1–8, with Levels read as the palette size) — it shipped then and was documented later; see Palette.
- v0.3.2 — Grid Offset X/Y: sub-pixel, animatable positioning of the whole raster (cells + QR grid + error diffusion field move together).
- v0.3.1 — Transparency group: Dither Alpha punches soft masks / feathered edges into the dither pattern (works with every Method, QR Style and Blend).
- v0.3 — error diffusion: 9 algorithms (Floyd-Steinberg, Jarvis-Judice-Ninke, Stucki, Atkinson, Burkes, Sierra ×3, Stevenson-Arce) on the cell grid, so QR Style size modulation works with all of them; new Diffusion group (Serpentine Scan, Diffusion Gain, Stability, Crawl Speed).
- v0.2 — first working build. Windows x64, AE 2022+ (tested on 2026).
Questions & answers
I switched Method from Bayer to Floyd-Steinberg and the panel changed — which controls belong to which method?
The two families make their decision differently, so they have different dials. Ordered (Bayer) decides every cell from its own value and a fixed matrix: its own dial is the matrix size (2×2 → 16×16 = 4 → 256 tone steps, a less visible repeat), and Corner Mode is Bayer-only (it re-orders how the matrix dots switch on; it greys out for error diffusion, and does nothing at 2×2). Bayer is locked to the layer, so it is perfectly stable in animation with nothing to tune. Error diffusion (Floyd-Steinberg, Atkinson, Stucki, Jarvis, Burkes, the Sierras, Stevenson-Arce) pushes each cell's rounding error onto its neighbours, and its whole character lives in the Diffusion group, which is dead for Bayer: Serpentine Scan, Diffusion Gain, Stability, Crawl Speed, Edge Warm-up. Everything else — Cell Size, Grid, Grid Offset, QR Style, Palette, Dither Alpha, Jitter, Blend — is shared and behaves identically. One thing that surprises people: the method never changes the dot size; that is Cell Size. See Cells and Diffusion.
I applied the effect to a black-and-white graphic and nothing happened. Why?
Dithering needs mid-tones to work on: it decides, cell by cell, whether a grey is closer to ink or to paper, and a picture that is already pure black and pure white gives it nothing to decide. Apply it to video, a photo or a gradient and the raster appears at once. If the graphic has soft edges or a drop shadow, those are mid-tones — and with Dither Alpha a feathered edge or a shadow gets punched into the pattern too. See Quick start and Transparency.
How do I reduce the flickering between frames?
Some frame-to-frame boiling is in the nature of dithering, and error diffusion is the worst at it: one grain of noise can flip a cell, and one flipped cell shifts every cell after it. Three controls exist for exactly this. Stability (Diffusion group) anchors the dots and adds a dead-zone on the input — 100 % is the calmest, 40–60 % keeps the organic texture. Serpentine Scan on chops the long diagonal chains that carry a flip a long way. Average Fill (Pixel grid) or the Relative grid feeds each cell the average of the area it covers, so a single noisy pixel can no longer decide a cell. If you need it dead still, a Bayer method is stable by construction. And if the flicker is in the source, calm the source first: precompose the footage and put Wide Time (Effect → Time), a temporal denoiser or an optical-flow smoother on the precomp, then dither that — the plug-in can only be as stable as the picture it is given. A future edition is planned to carry its own temporal tools; until then this is the recipe. See Diffusion → Stability and Average Fill.
I actually want the crawling "worms". How do I get them on purpose?
Turn the anti-worm switches off: Serpentine Scan OFF (the name describes the scan path, and ON is the anti-snake setting), Stability 0 %, then Crawl Speed 20–40 % so the worms swim even on a completely still image. Method Floyd-Steinberg, Cell 2. Diffusion Gain above 100 % makes them fat and aggressive; below 100 % the picture drifts toward clean posterization instead. Keyframe Crawl Speed, or drive it from audio, for worms that dance. This is the Living worms recipe — see Diffusion and Recipes.
How do I make a logo or text disintegrate into the dither?
Switch on Dither Alpha (Transparency group): soft transparency — a feathered mask, a gradient matte, a drop shadow — is then dithered too, every cell fully opaque or fully transparent, on the same grid as the colour. Put a big feathered mask on the logo layer, Method Atkinson, Cell 2, and keyframe the mask feather (or the mask path): the logo crumbles into the pattern instead of fading. Add Size Modulation 200 % and the edges crumble into big blocks; Blend With Original 50 % gives half-punched, half-feathered edges. See Transparency and the Disintegrating logo recipe in Recipes.
How do I make the dither react to music?
Select the music layer → Animation → Keyframe Assistant → Convert Audio to Keyframes, then pick-whip a parameter to the Audio Amplitude slider. Gain is the classic target (0.6 + value/30, tune the divisor): the picture pulses between more ink and more paper. Four others read the same track differently: Cell Size (keep it to 1–4 or the look changes rather than pulses), Dither Strength (dissolves toward flat quantization between hits), Size Modulation (the QR blocks pump) and Crawl Speed (worms that dance). Convert Audio to Keyframes writes one keyframe per frame, so divide the value well down and run Window → The Smoother over the slider if it stutters; keep the multiplier small enough that the quietest frame still looks like your shot. See the Audio-reactive raster recipe in Recipes.
Can I animate the raster itself — a slowly scrolling CRT grid, a nervous shake?
Yes: Grid Offset X / Y slides the whole grid — cells, the QR coarse grid and the error-diffusion field together — by a pixel amount with sub-pixel precision. Keyframe X for a slowly scrolling raster over a still image, wiggle() both for a nervous CRT feel, or pick-whip them to audio. The offsets are in layer pixels and follow the preview resolution, so Half-res previews match the final. For a jump rather than a slide, Jitter shifts the pattern in discrete steps over time (100 % = 12 jumps per second) — the restless shimmer of animated GIFs, visible during playback. See Cells → Grid Offset and Jitter.
LED wall or different delivery sizes — should I use the Pixel or the Relative grid?
Pixel when the raster must match a physical pixel pitch: LED walls, tiling across displays, matching an existing raster by counting pixels. Cell Size is in pixels and the QR coarse grid is Cell Size × 2^n with no ceiling, so two walls of different heights get the same physical grid. Relative when the same comp is delivered at several resolutions — proxy → final, 720p → 4K, a square crop and a wide master: the cell is a percentage of the layer height, so the look survives the resolution change instead of turning into a different texture, and the biggest QR block is capped at the layer height. Two details in both modes: Grid Offset stays in pixels (it is a nudge, not a layout unit — for a resolution-independent anchor use Grid Origin: Center instead), and Relative is bit-identical across resolutions only where the cell works out to whole pixels — otherwise "the same picture", not the same bits. See Which grid should I use?
How do I build the "QR wall" — and why does Size Modulation seem to restart at the top of the slider?
QR Style makes the cell size depend on brightness: dark areas collapse into big blocks, bright areas stay fine. Recipe: Cell 2, Size Modulation 300 %, Duotone; Invert Modulation on bright footage; Corner Mode for corner-connected clumps. Cells stay powers of two, so the sizes tile without seams. The "restart" is a known property of Pixel mode: with a large Cell Size and Size Modulation above ~300 % the biggest block can outgrow the frame, its brightness class is then decided by a single pixel, and the whole frame can flip to small cells. Either keep Size Modulation ≤ 300 % at Cell Size 3, or switch Grid → Relative, where the biggest block is capped at the layer height and every block reads the average of its area, so the top of the slider stays smooth. See QR Style.
My colours are not in the Preset list — can I use the colours of the shot, or a brand palette?
Yes: Mode → Custom Palette. The same quantizer runs as for the presets (nearest colour, then dithered by the current Method), so QR Style, Diffusion and Dither Alpha behave exactly as before — only the allowed colours change. Two things to know. In this mode Levels means the palette size, not steps per channel: Levels 6 makes Color 1–6 live and Color 7–8 grey out. And the wells are ordinary colour parameters: eyedropper them off the footage itself for a raster that belongs to the shot rather than to 1985, type in the hex values of a machine the preset list lacks (MSX, Apple II, Teletext) or of a brand guide, and keyframe them — drifting two wells through a hue recolours the whole image without moving a single dot. See Palette.
Do Half and Quarter previews show me what the final render will look like?
Yes. Cell Size, Grid Offset and the QR coarse grid all follow the preview resolution, so a Half-res preview shows the same raster the full render will — the cells are simply drawn at the preview's scale. Two things still belong to the final render: set the comp to 100 % resolution for the actual output, because the cell grid is computed in layer pixels; and error diffusion at Cell Size 1 on 4K is the slow path (roughly half a second per frame per core) — Cell Size 2–3 is 4–20× faster and usually looks better anyway. See Tips and the performance note in Diffusion.